English translation
Claude Code Setup and Login: Get the Command-Line Environment Running
AI Article Decision Snapshot
Turn the lesson into workflow, model, budget, and security checks before choosing tools.
Use this quick snapshot before leaving the article. It keeps the next search tied to practical AI software, model/API, cost, privacy, and implementation questions.
Workflow fit
Identify the real job behind the article: coding, research, document review, support, analytics, content, or internal automation.
Model or tool decision
Decide whether the next step is a software shortlist, an AI tool comparison, an API platform choice, or a model benchmark.
Budget and usage signal
Estimate seats, API calls, prompt volume, retries, review time, and fallback work before assuming the workflow is cheap.
Security and privacy review
Check whether source code, customer data, private documents, prompts, logs, or embeddings will enter the AI workflow.
This article focuses solely on installing Claude Code. Many learners get stuck early in AI-powered programming—not due to model limitations, but because their very first environment setup fails: the terminal doesn’t recognize commands, Node.js versions are incompatible, Windows users aren’t sure whether to use PowerShell or WSL, and even after logging in, they don’t know where or how to launch Claude Code.
So this article does just one thing: get your command-line environment working reliably—ensuring you can successfully launch Claude Code inside a real project directory.
After installation, I’ll verify that Claude Code is running in the correct project directory, can read files, and that you know exactly which command to run for validation. Never hand it real tasks before confirming your environment works.

Most beginners stall not because they don’t understand the tool—but because one link in the chain (shell, Node.js, package manager, or project directory) is misconfigured. Listing these checks makes this guide feel like a genuine hands-on log.
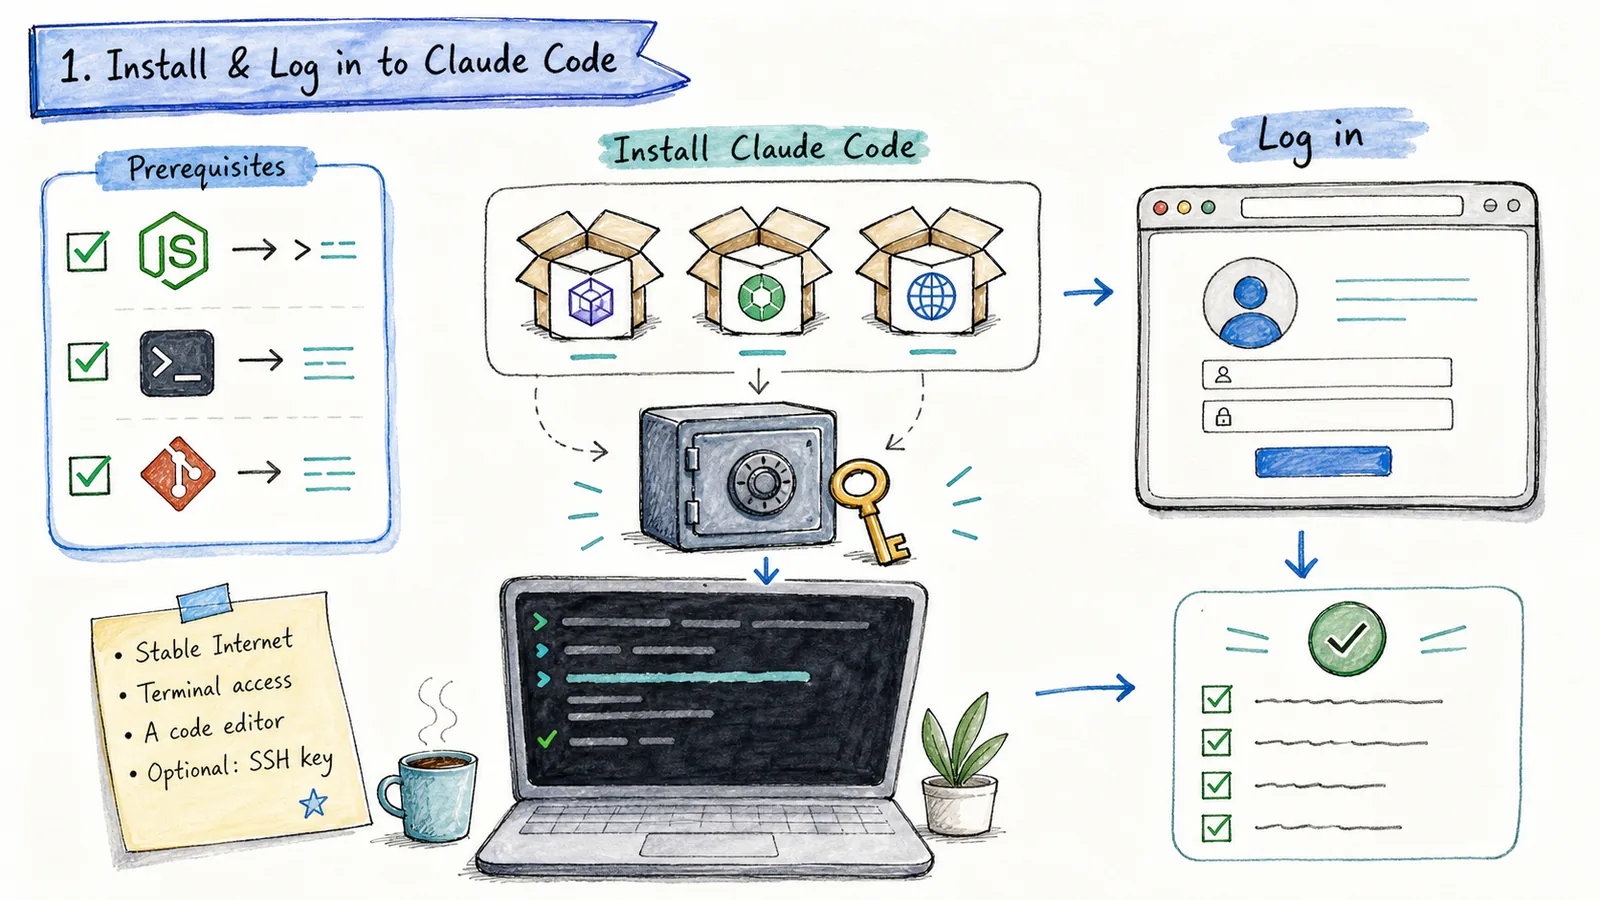
Prerequisites
The official documentation states clearly: you need a terminal, a code project to work with, and an account authorized to use Claude Code. Claude Code runs natively on macOS, Linux, Windows, and WSL. Windows users may run it natively—or within WSL2. Our recommendation: if your project already lives in the Windows filesystem, start with native Windows; if you regularly develop Linux backend services, Docker applications, Python backends, or deep learning environments, WSL2 will feel more natural.

When installing Claude Code, the priority isn’t rushing into code editing—it’s verifying version compatibility, login status, working directory, and successful execution of a simple command. Only then do you have a solid baseline for troubleshooting later.
Before beginning, confirm three things:
git --version
node --version
npm --version
Even if you plan to install via other methods, we still recommend keeping Node.js and Git installed—many frontend projects, build scripts, and CLI tools depend on them.
Recommended Installation Methods
As of 2026-06-03, the official Claude Code documentation prioritizes native installation.

You don’t need to absorb every detail of “Claude Code Installation and Login: Get Your Command-Line Environment Running First” all at once. Start with a small, actionable verification step—and then follow the diagram and text to fill in conceptual gaps.
For macOS, Linux, and WSL:
curl -fsSL https://claude.ai/install.sh | bash
For Windows PowerShell:
irm https://claude.ai/install.ps1 | iex
For Windows CMD:
curl -fsSL https://claude.ai/install.cmd -o install.cmd && install.cmd && del install.cmd
If you prefer package managers, Windows users can also run:
winget install Anthropic.ClaudeCode
The official npm global installation method remains available:
npm install -g @anthropic-ai/claude-code
However, note the official installation page explicitly warns against using sudo npm install -g, as it introduces permission and security risks. In the past, many CLI tools encouraged sudo installs—leading to messy global paths and hard-to-resolve conflicts. When possible, prefer native installation.
Verifying Installation
After installation, resist the urge to jump straight into large projects. First, run in your terminal:
claude --version
claude doctor
claude --version confirms the command is recognized and available; claude doctor performs environment diagnostics. If both return successfully, future troubleshooting becomes significantly easier.
Then navigate to a small project directory:
cd your-project
claude
On first run, you’ll be guided through account login—just follow the browser-based prompts. Upon successful login, you should see the Claude Code interactive session appear directly in your terminal.
Windows User Guidance
Windows users often struggle to choose among PowerShell, CMD, Git Bash, and WSL. Our advice is straightforward:
- For frontend, desktop scripting, or Windows-native tooling: start with PowerShell.
- For Linux backend services, Docker, Python backends, or deep learning environments: prioritize WSL2.
- When copying official commands, carefully distinguish between PowerShell and CMD: PowerShell prompts show
PS C:\, while CMD typically shows onlyC:\.
After installation, pick and stick with one consistent entry point. Avoid switching daily between PowerShell, WSL, and Git Bash—each has different file system visibility, toolchain behavior, and environment variables, meaning Claude Code will “see” a different context each time.
First Safety Rule
Never paste API keys, database passwords, or server credentials during your first session. Claude Code reads project files—and may execute commands. Always begin by letting it analyze ordinary source code directories—not .env files, private keys, or certificates.

To apply “Claude Code Installation and Login: Get Your Command-Line Environment Running First” to your own workflow, narrow the scope: validate just one critical decision point.

After completing “Claude Code Installation and Login: Get Your Command-Line Environment Running First”, try adapting it to your own scenario. Pay close attention to whether inputs, processing, and outputs align as expected.
In the next article, we’ll dive into a real project: let Claude Code first read your repository—and then make its first small change.
References:
Apply This Lesson
Turn this article into AI software, model, API, and security decisions.
English Article FAQ
Use this article as evidence before choosing AI tools
How should I use this AI Tutorials article?
Use it as the implementation or learning layer, then connect the idea to AI software buyer guides, tool comparisons, benchmarks, API choices, and security checks before making a production decision.
Is this English article different from the Chinese original?
The English edition is localized for global AI readers while preserving the original diagrams, screenshots, prompts, code examples, and source context from the Chinese article.
What should I read after Claude Code Setup and Login: Get the Command-Line Environment Running?
Continue with AI Software Buyer Guides, AI Tools Workbench, Best AI Coding Agents, AI Model Benchmarks, OpenAI vs Anthropic API, or LLM Security Tools depending on the decision you need to make.
Can this article alone choose an AI product or model?
No. Treat the article as evidence and context, then validate fit with pricing, privacy requirements, integration effort, benchmark results, workflow tests, and fallback planning.
Continue