English translation
DeepSeek Integration with Personal Knowledge Bases: Common Questions and Solutions
AI Article Decision Snapshot
Turn the lesson into workflow, model, budget, and security checks before choosing tools.
Use this quick snapshot before leaving the article. It keeps the next search tied to practical AI software, model/API, cost, privacy, and implementation questions.
Workflow fit
Identify the real job behind the article: coding, research, document review, support, analytics, content, or internal automation.
Model or tool decision
Decide whether the next step is a software shortlist, an AI tool comparison, an API platform choice, or a model benchmark.
Budget and usage signal
Estimate seats, API calls, prompt volume, retries, review time, and fallback work before assuming the workflow is cheap.
Security and privacy review
Check whether source code, customer data, private documents, prompts, logs, or embeddings will enter the AI workflow.

This original article is relatively brief; the key addition I’ve made is a structured troubleshooting sequence. When issues arise with knowledge base software, always follow this order:
- First confirm whether documents have been successfully imported;
- Then verify whether indexing has completed;
- Only afterward examine model responses.
Many users jump straight to swapping models—yet their documents haven’t even entered the retrieval index.

We recommend maintaining your own troubleshooting checklist:
- Observed symptom
- Steps to reproduce
- Screenshot(s) of relevant logs
- Methods already attempted
This saves time when similar issues recur—and makes it far easier to seek help from others. A truly useful FAQ should accelerate next time’s troubleshooting.
Common Issues and Solutions When Using Personal Knowledge Base Software
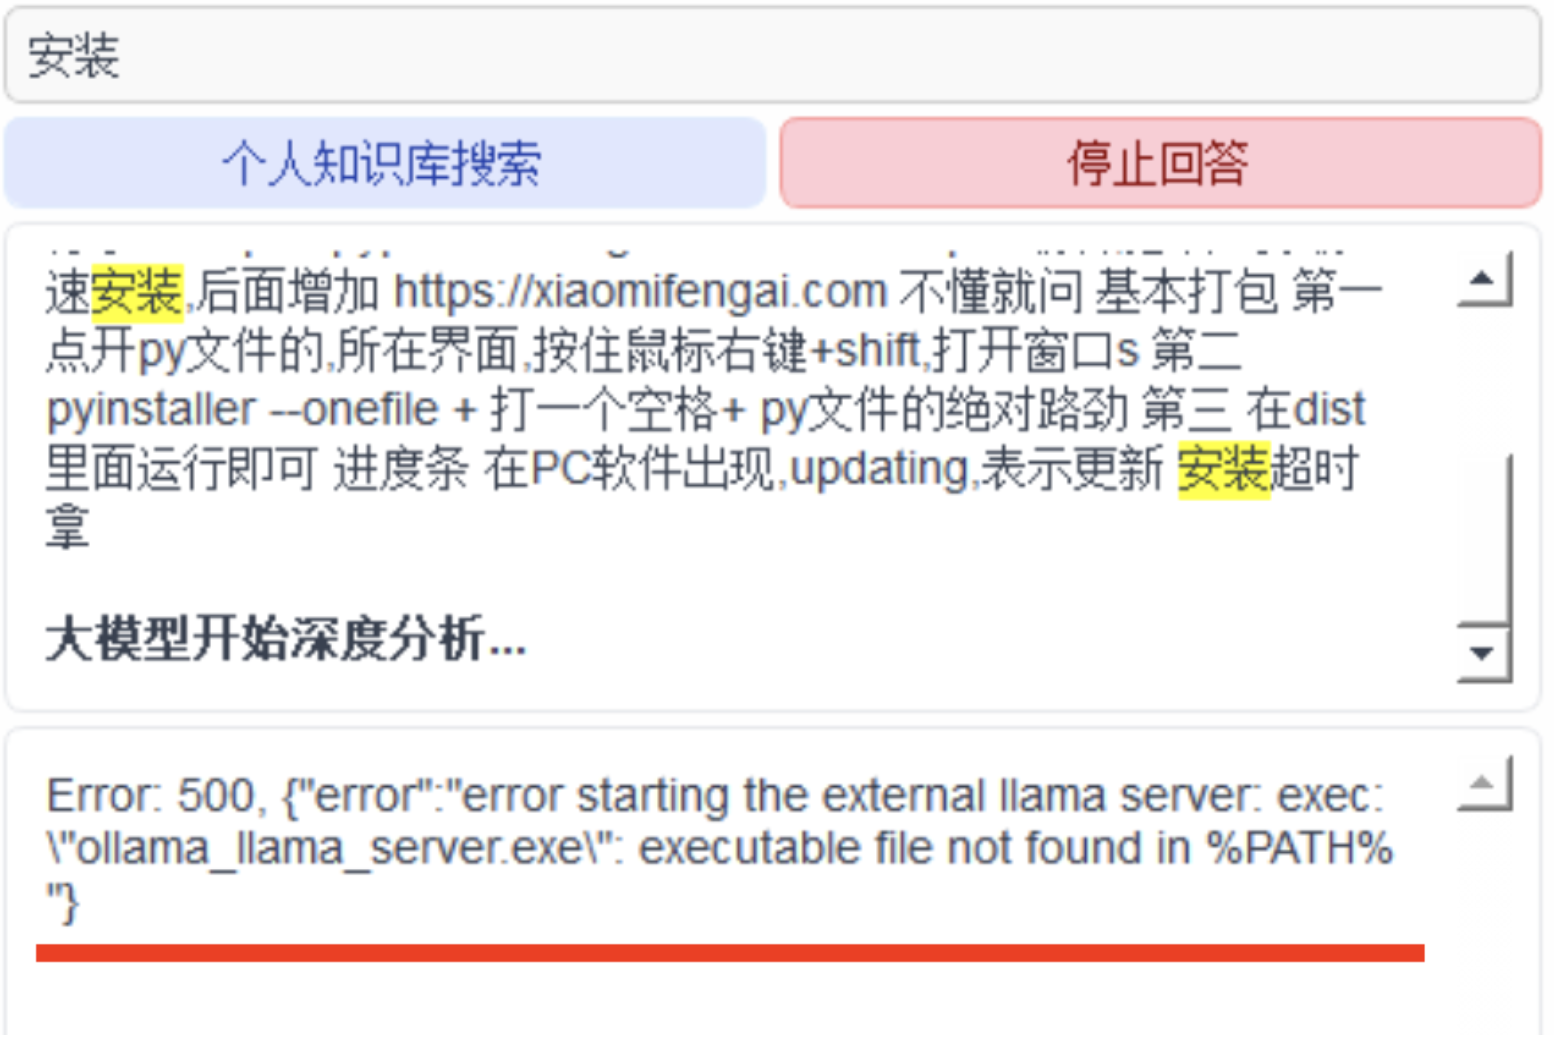
Issue 1: Error Message Indicates ollama Is Not in the System PATH

When revisiting “Summary of Common Issues When Integrating DeepSeek with Personal Knowledge Base Software,” avoid tackling large-scale tasks upfront. Instead, start with a single, simple test case to verify whether the core workflow is clear and functional.

If you haven’t yet fully internalized “Summary of Common Issues When Integrating DeepSeek with Personal Knowledge Base Software,” revisit the four actions outlined on this card to walk through the process again.
Resolution:
Adding ollama to the system PATH differs slightly between Windows and macOS. Below are step-by-step instructions for each platform.
Adding ollama to the PATH on Windows
Method 1: Using the Installation Directory
-
Confirm the
ollamainstallation path OpencmdorPowerShell, then run:where ollamaExample output:
C:\Users\YourUser\AppData\Local\Programs\Ollama\ollama.exe -
Add to Environment Variables
-
GUI method (recommended):
- Press
Win + R, typesysdm.cpl, and press Enter. - Go to the “Advanced” tab → click “Environment Variables…”
- Under either “System variables” or “User variables”, locate and double-click
Path. - Click “New”, then enter the directory containing
ollama.exe(excluding the executable filename itself). Example:C:\Users\YourUser\AppData\Local\Programs\Ollama - Click OK to save.
- Press
-
Command-line method (for current user only, via
cmd):setx PATH "%PATH%;C:\Users\YourUser\AppData\Local\Programs\Ollama"
-
-
Verify the change Close and reopen
cmd, then run:ollama --versionIf successful, the version number will be displayed.
Adding ollama to the PATH on macOS
On macOS, ollama is typically installed by default to /usr/local/bin/ollama, or to /opt/homebrew/bin/ollama if installed via Homebrew.
-
Confirm the
ollamainstallation pathwhich ollamaPossible output:
/usr/local/bin/ollama -
Manually add to
PATH(ifwhich ollamareturns nothing)-
If
ollamais installed in/usr/local/bin:export PATH="/usr/local/bin:$PATH" -
If installed via Homebrew (Apple Silicon):
export PATH="/opt/homebrew/bin:$PATH"
-
-
Make the change permanent Append the
exportline to your shell configuration file:-
For
zsh(default on recent macOS):echo 'export PATH="/usr/local/bin:$PATH"' >> ~/.zshrc source ~/.zshrc -
For
bash:echo 'export PATH="/usr/local/bin:$PATH"' >> ~/.bashrc source ~/.bashrc
-
-
Verify
ollama --versionIf the version number appears,
ollamahas been successfully added to yourPATH.

Before reading “Summary of Common Issues When Integrating DeepSeek with Personal Knowledge Base Software,” use the accompanying illustration to orient yourself to the main workflow. After reading, review which steps you can execute immediately—and which ones require additional reference materials or setup.
Apply This Lesson
Turn this article into AI software, model, API, and security decisions.
English Article FAQ
Use this article as evidence before choosing AI tools
How should I use this AI Tutorials article?
Use it as the implementation or learning layer, then connect the idea to AI software buyer guides, tool comparisons, benchmarks, API choices, and security checks before making a production decision.
Is this English article different from the Chinese original?
The English edition is localized for global AI readers while preserving the original diagrams, screenshots, prompts, code examples, and source context from the Chinese article.
What should I read after DeepSeek Integration with Personal Knowledge Bases: Common Questions and Solutions?
Continue with AI Software Buyer Guides, AI Tools Workbench, Best AI Coding Agents, AI Model Benchmarks, OpenAI vs Anthropic API, or LLM Security Tools depending on the decision you need to make.
Can this article alone choose an AI product or model?
No. Treat the article as evidence and context, then validate fit with pricing, privacy requirements, integration effort, benchmark results, workflow tests, and fallback planning.
Continue